
This is my submission for XDrive Photo Lesson 13 – Raw vs Jpg.
As I said in my previous post, nowadays I only shoot in raw, but for this lesson, I shoot in raw and jpg. In other words when I click, two images will be recorded by the camera: one in raw, and one in jpg.
I guess many of my readers are shooting in jpg. In my post for lesson 12, even though I didn’t spell it out, I was trying to show that shooting in jpg is quite all right. I believe when Raj encouraged us to shoot in raw, he meant if we are “serious” in photographing. Not everyone is serious in photographing even though almost all of us are serious in catching moments. I wasn’t serious until two years ago.
I have two confessions: (1) I have several 20×30 photos hanging in our family room, and they were shot with a point-and-shoot camera and they were shooting in jpg. They don’t look like professional photos (I didn’t know Photoshop at the time), but they never fail to bring a smile to my face because they remind me of the good time our family had in Ireland. (2) When I first started using a DSLR, I shot in both raw and jpg; I always edited the raw photo. Many times after I had completed editing, I found out that the jpg my camera had created looked better than mine. I didn’t zoom-in to check all the details, but I liked what I saw.
With that said, moving forward… now that I am more serious in photographing, I enjoy Raj’s lessons a lot. In this lesson, he showed us, with examples, the difference between shooting in raw and jpg. I encourage you to read the lesson.
Raj was focusing on over/under exposed photos in his lesson. I like to start with a normal, neither over nor under exposed photo. In Raj’s comment for my previous post, he said, “In general, a nicely exposed picture would not show so much of difference with raw vs jpg.”
A Not Over and Not Under Exposed Photo
RAW original / RAW final

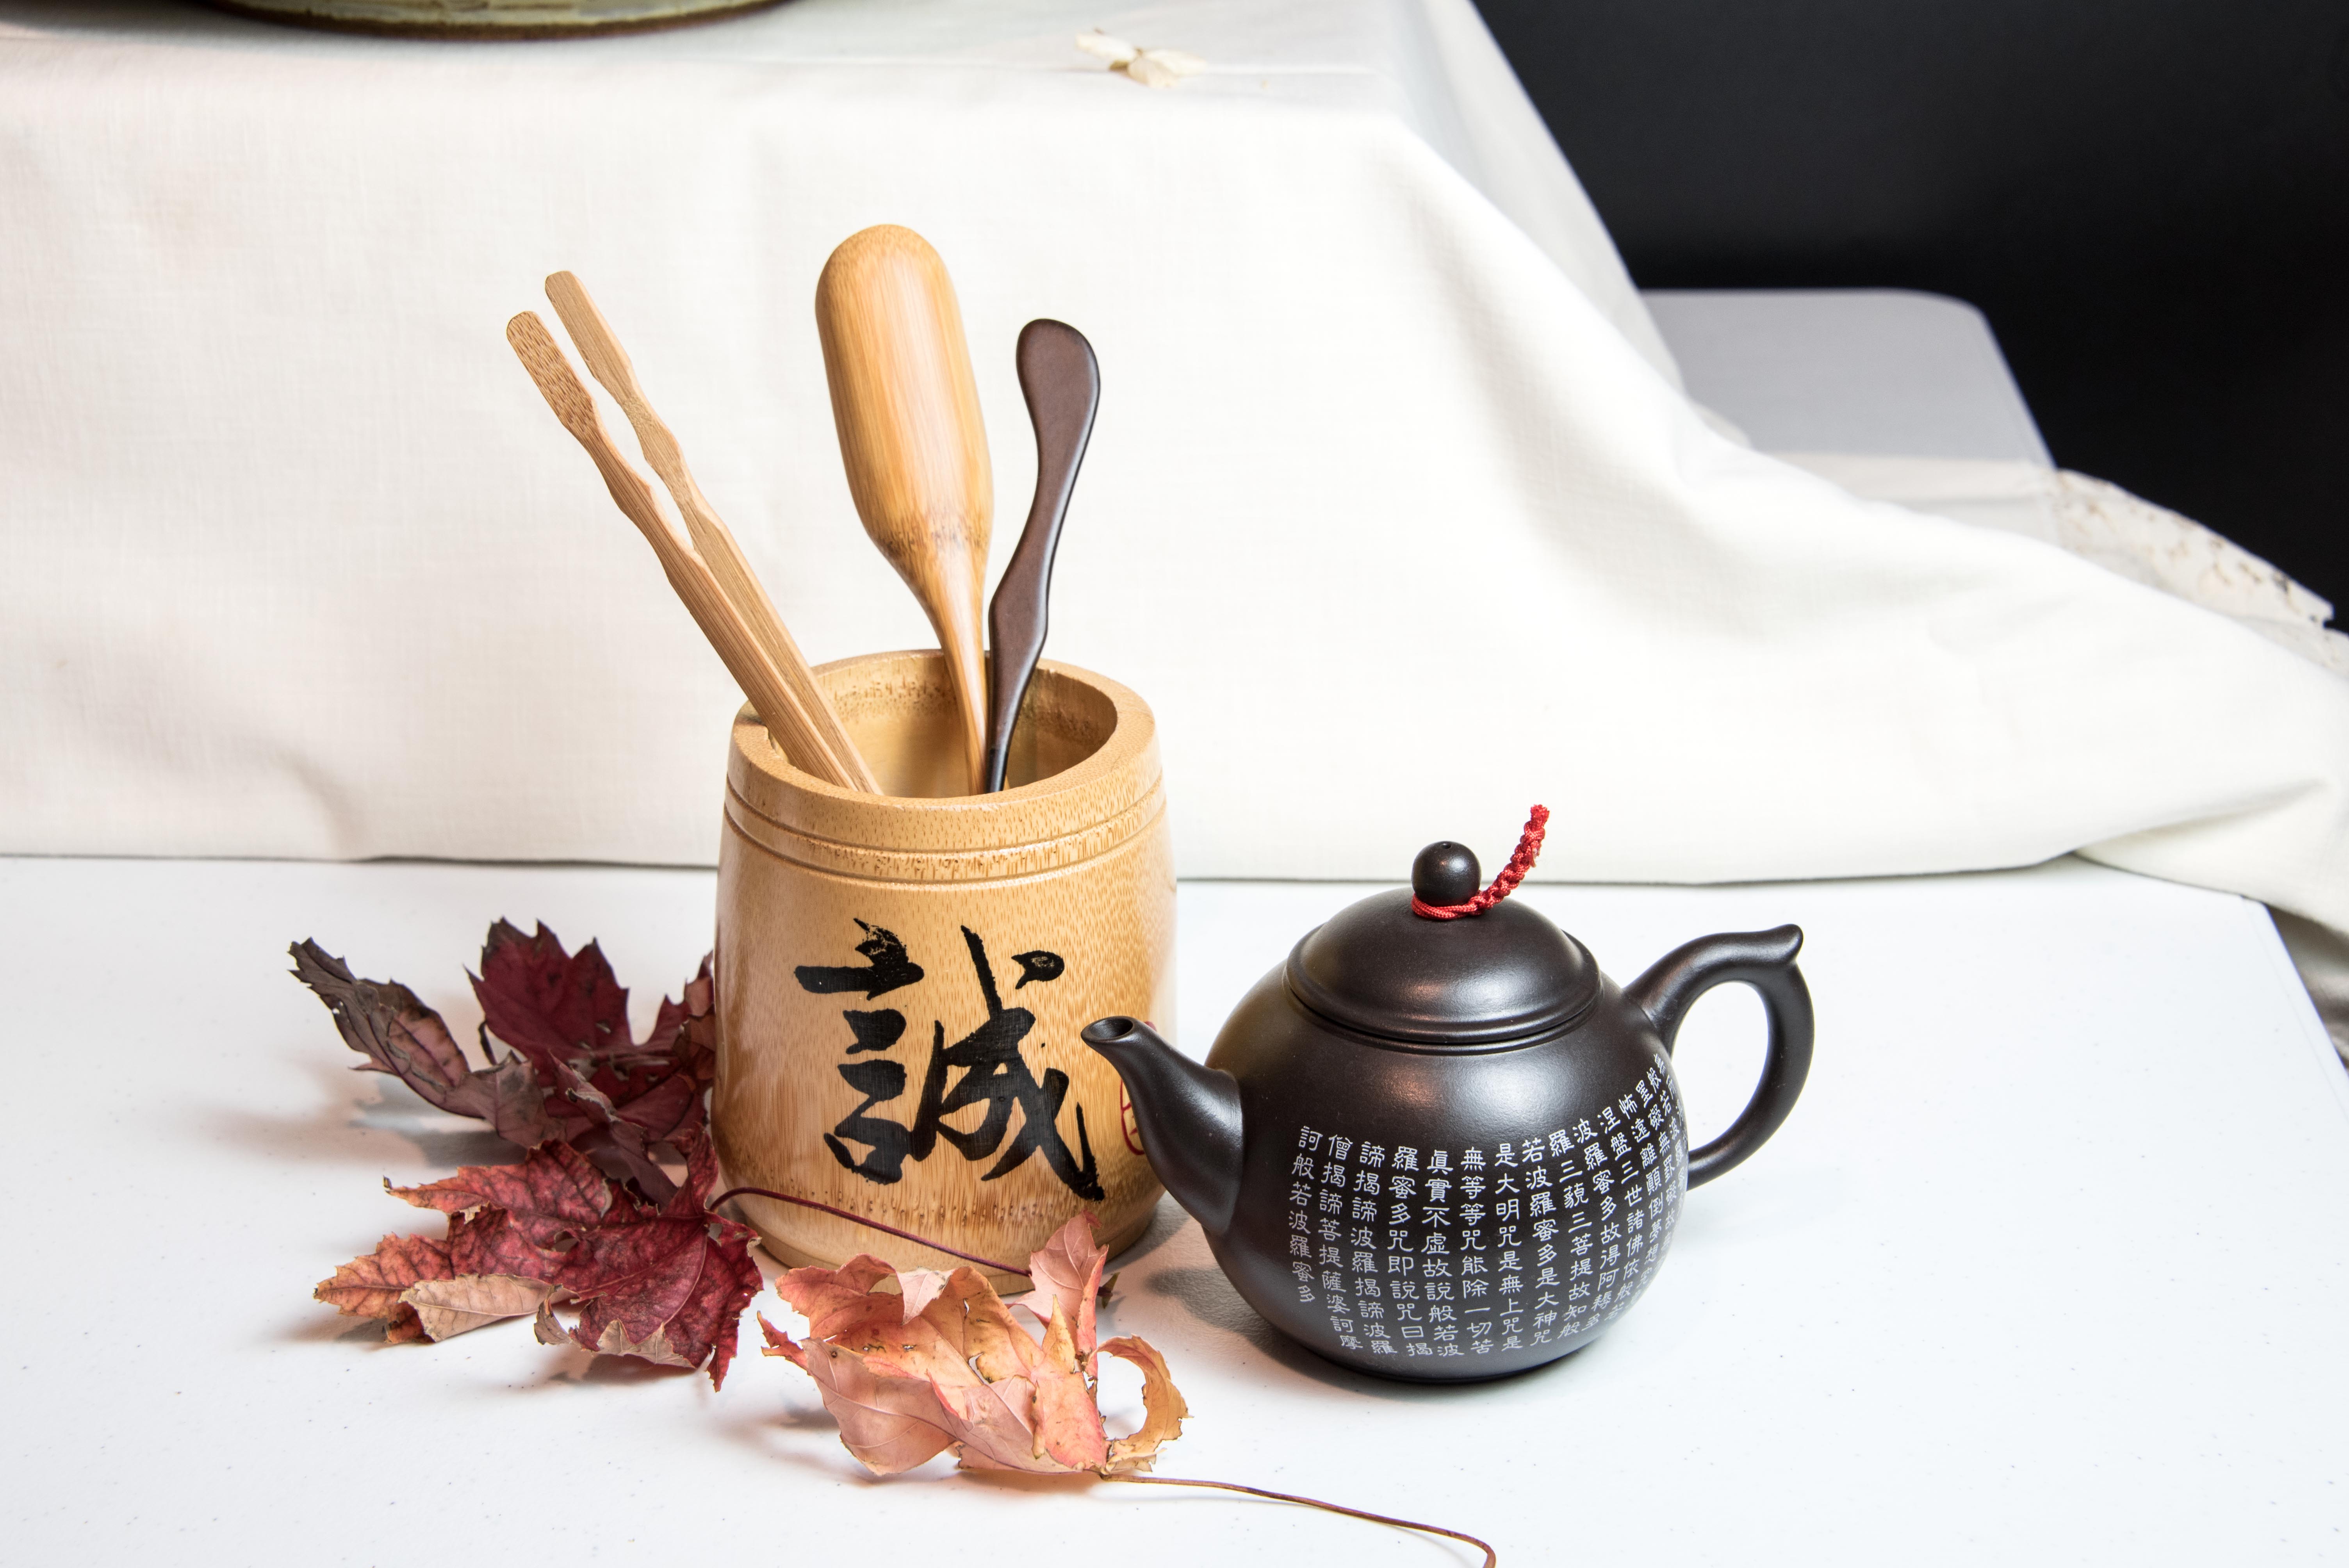
JPG original / JPG final

The jpg version is a little more colorful — on my PC, maybe not in WP (also seemed being cropped?). Still, I think camera did a pretty decent job in converting raw to jpg, don’t you agree? They look quite similar, if you ask me.
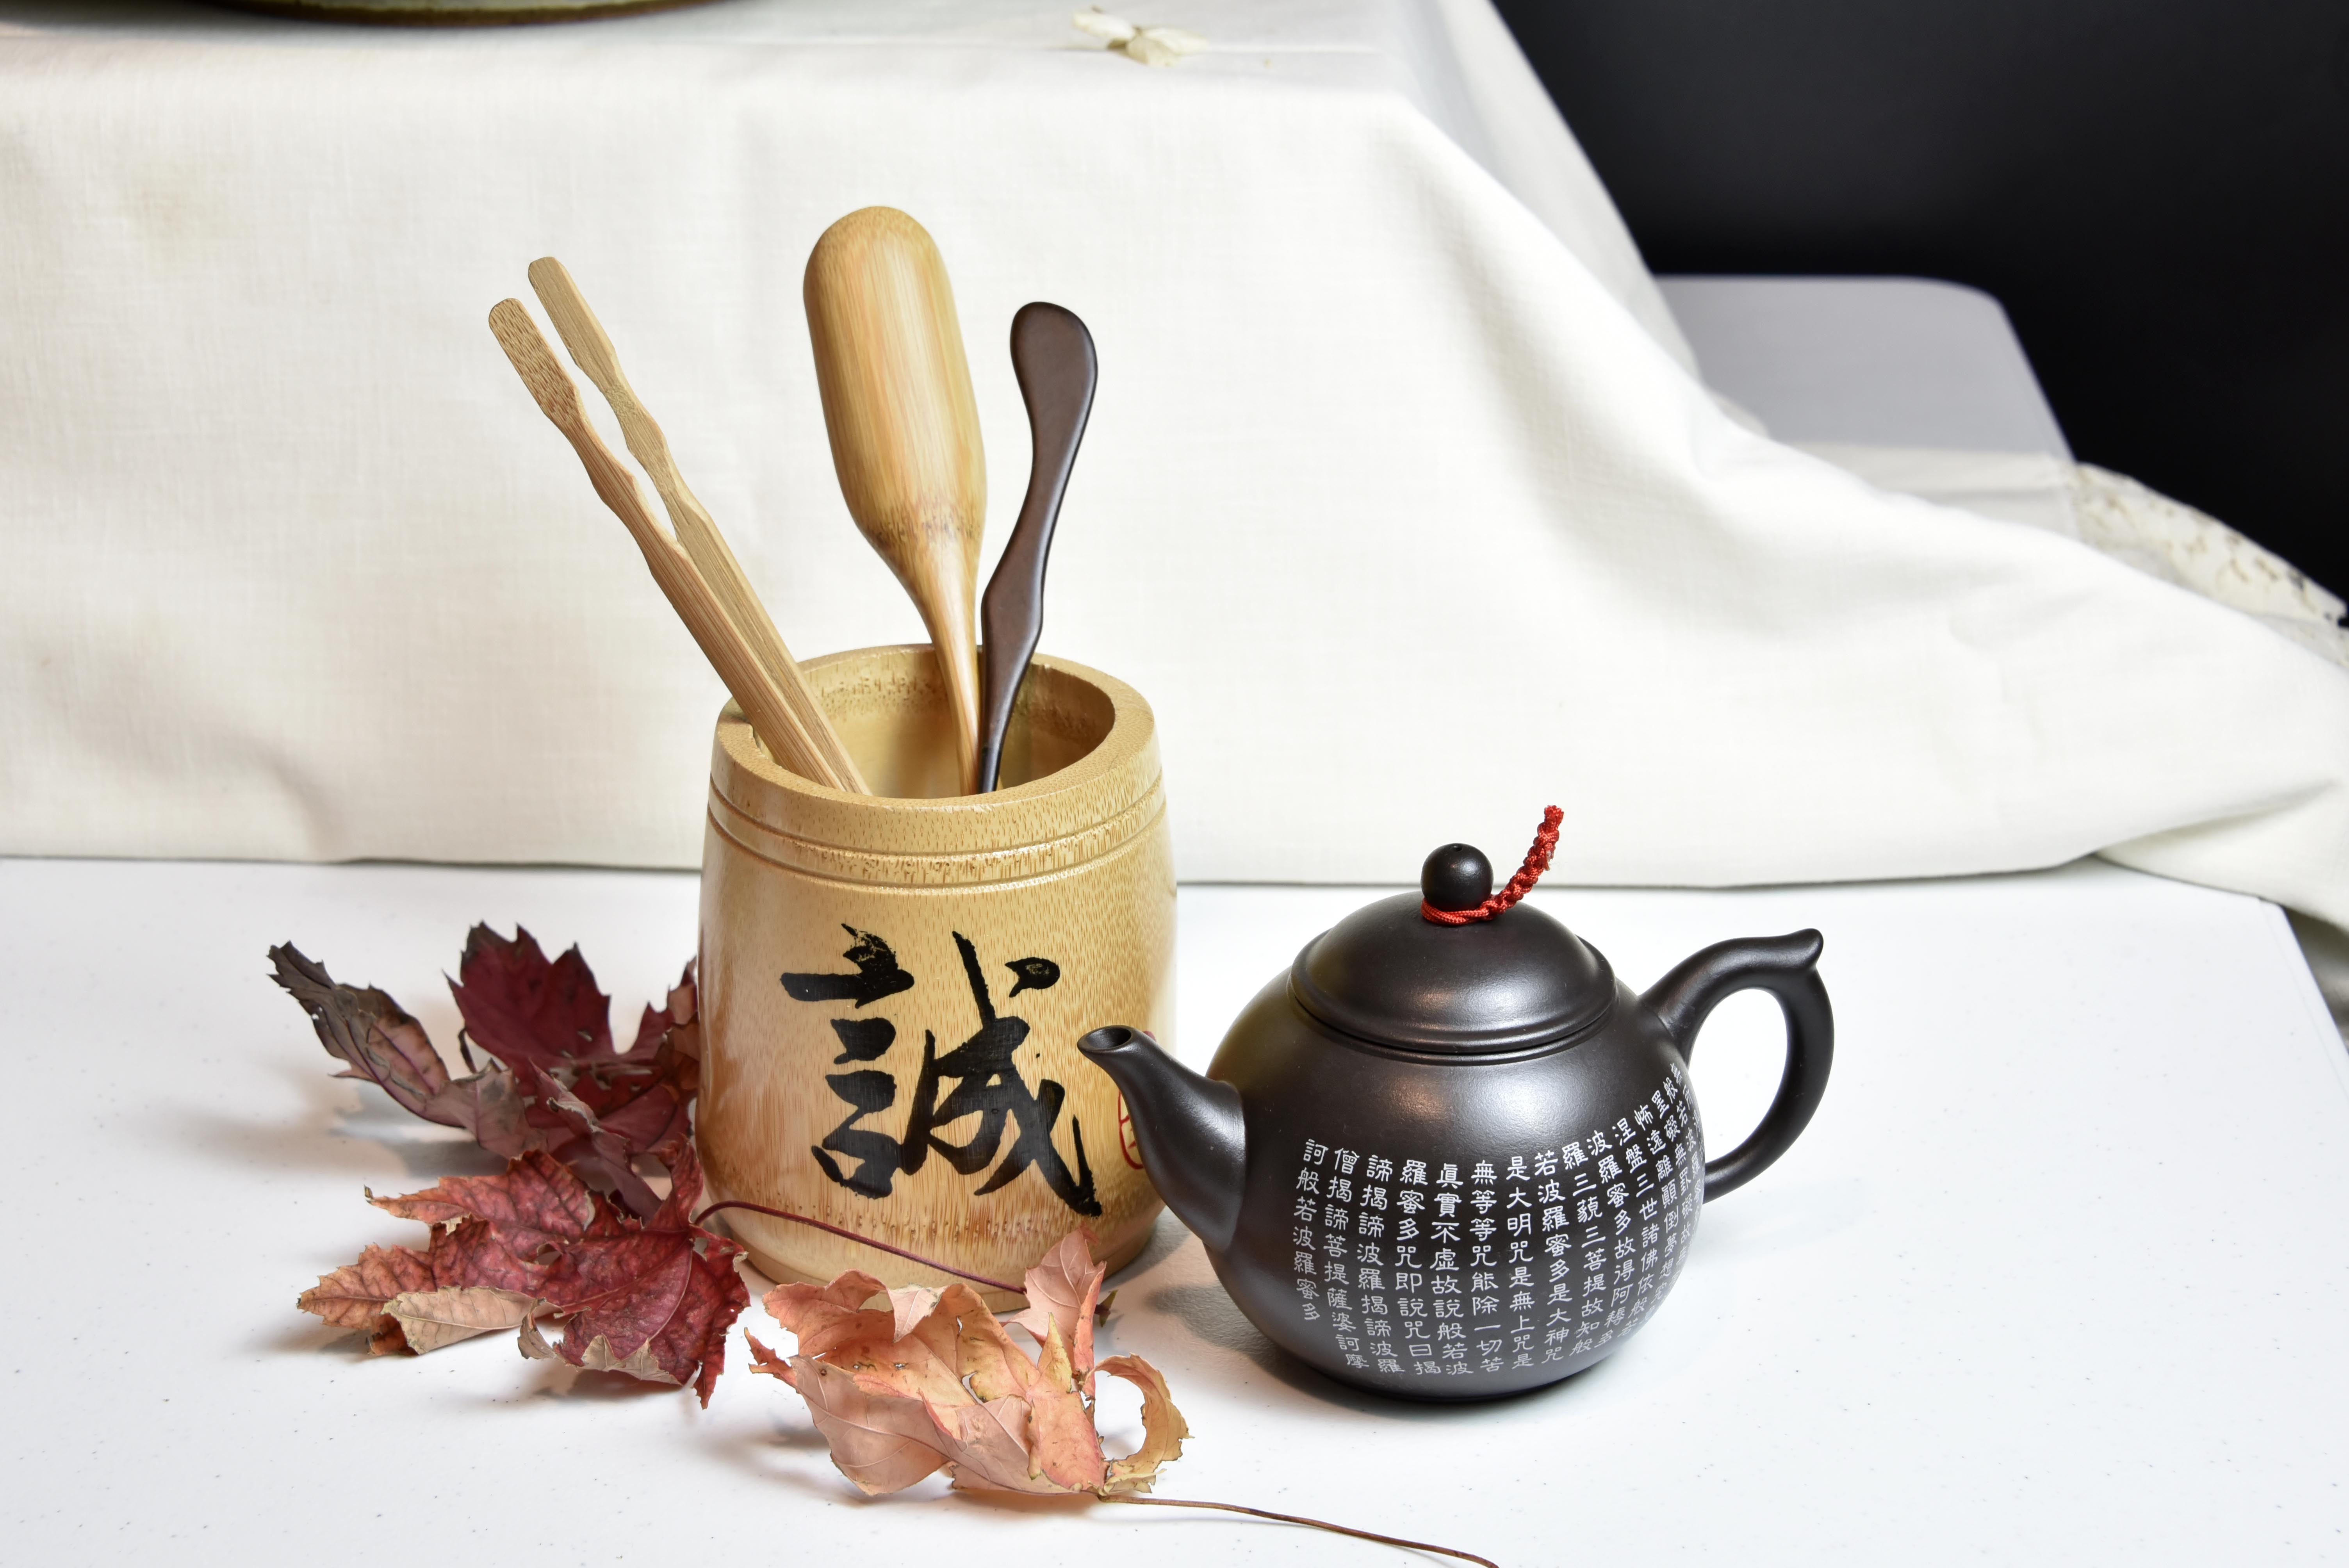
Over Exposed Photo
RAW original / RAW final


JPG original / JPG final

Clearly, jpg has lost more details (look at the leftmost tea tool in the cup).
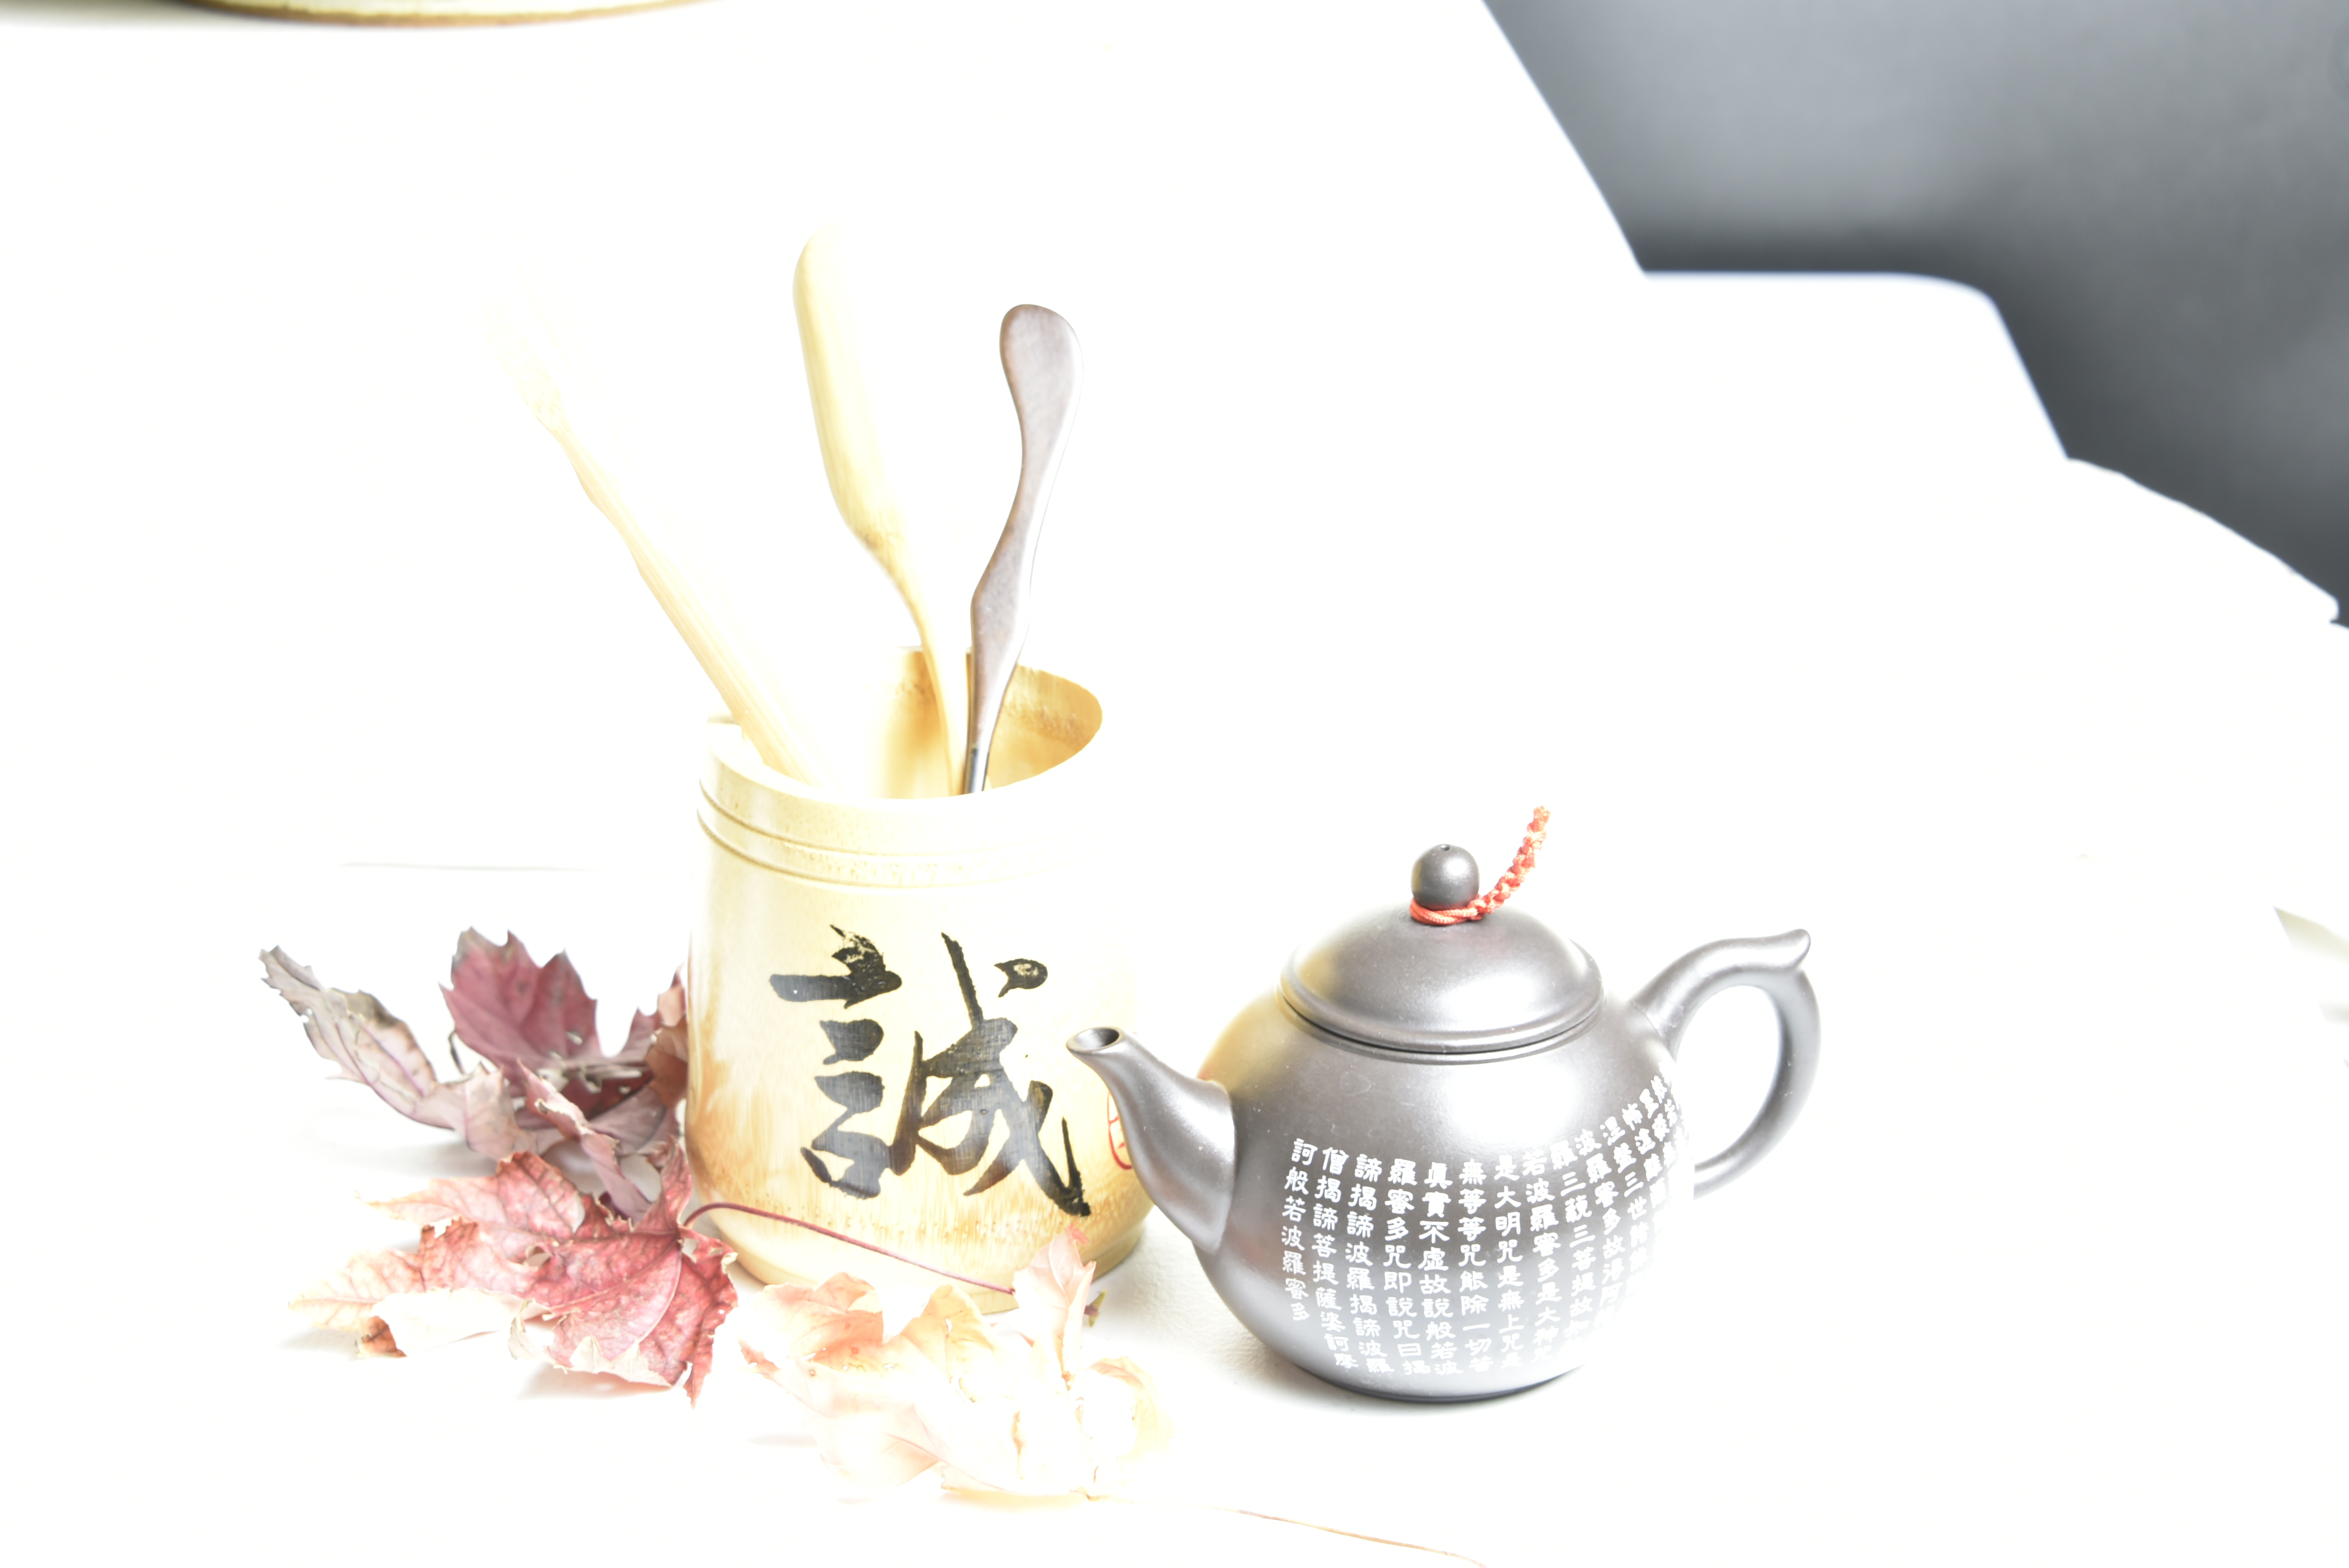
Under Exposed Photo
RAW original / RAW final

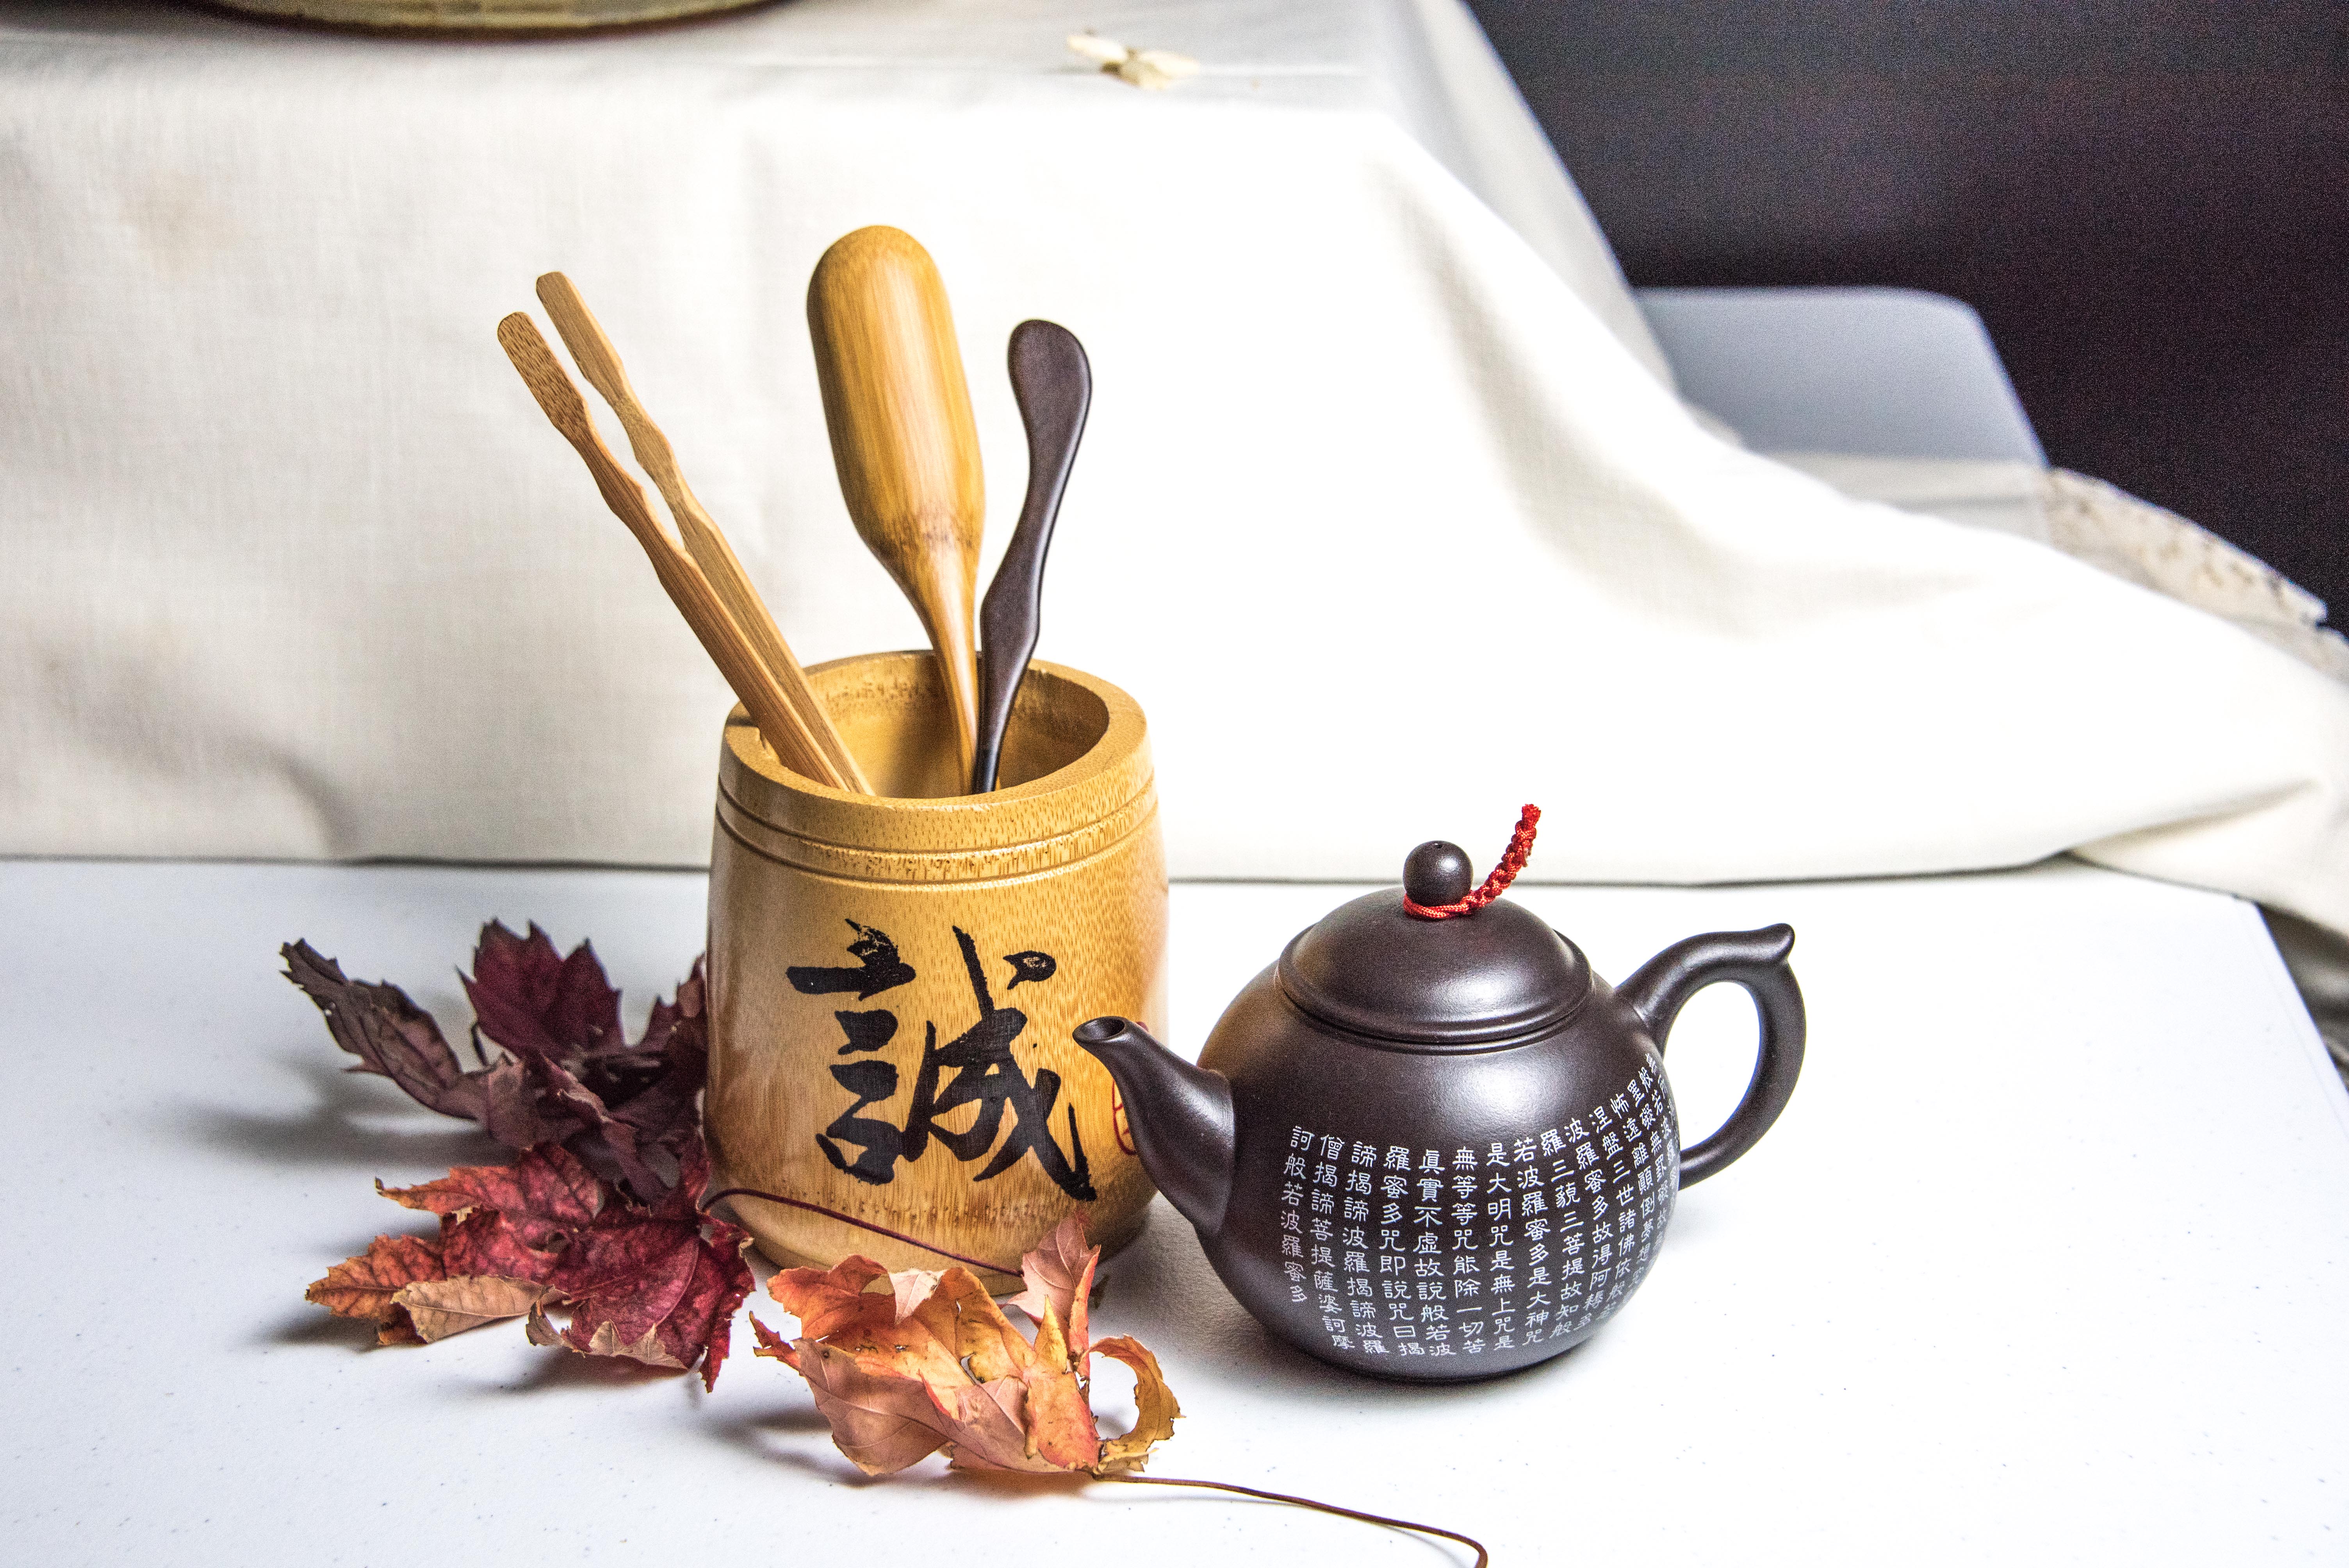
JPG original / JPG final


I would like to point out that if you have to choose either under expose or over, choose under expose because you can recover the photo much better.
My conclusion? I will continue shooting in raw (because I want to ;-), but I will not hesitate shooting in jpg if I have to deliver photos quickly. (Fair, Raj?)
I learned a lot from this experiment, which, I am sure, wouldn’t happen if I am not taking Raj’s lesson. Thank you, Raj.
Thanks for visiting my blog.

Thanks Helen for your submission, the session is not complete unless I see your post and reply. 😀 Wonderful post, great work!
Properly exposed set: Yes, I do see the camera doing an excellent job with jpg. There are lots of tweaks and algorithms involved in the software to produce a jpg and definitely, it’s doing an excellent job! For most of the people will be satisfied for sure. But the raw is a different story though. It gives total liberty on how much you can push. If one has to do any creativity raw is the best choice. Check both the images in full zoom. Check those Chinese characters, the raw has much more details and looks sharper. Also, check the bottom left area of that black pot, you should see details on the pot lost in jpg. Same is happening on the floor where the black pot’s shadow is falling, details are very soft in jpg. Color adjustment and other things can be adjusted, but once you lose the details, they cant be recovered.
Overexposed set: for some reason, I am not happy with the results raw has given. It should have been much better than this. I see more contrast in the image, this resulted in the shadows concealing the details. If you have time do this, try bringing down the brightness until you are able to show the details on the fabric behind in both the sets and then check. Right now the jpg and raw have different treatment altogether.
Underexposed set: Hands down raw wins! Raw has much more details than jpg. This is where you can see the actual advantage of raw. The result is self-evident no further explanation is required I guess.
The main thing to understand, that not all the pictures are exposed properly, in the middle of travel we do have to focus on a lot of things and often we see the badly exposed pictures only once you get back to home. Sometimes the loss is irrecoverable. So I do only raw. Yes if you have to have a copy immediately you can go for jpg too. But I feel it doesn’t take much time to get the jpg out of raw.
This critical review is part of XDrive’s photography learning sessions. Thanks Helen for your contribution. Really adds a lot of value for everyone!
Raj
LikeLiked by 2 people
Thanks, Raj. I am laughing here. You really have a good pair of eyes!!! I have been staring at these photos whole day in full zoom until my eyes hurt, and I still didn’t see that much of difference. But after you mentioned them, suddenly I saw them, too. Ha ha ha.
I am going to stay away from these photos and come back to look at them again. Maybe that will help me see even better.
Have a wonderful day.
LikeLiked by 1 person
Ha..ha.. You need a a sleep now. Check them back tomorrow. 😀 Good night to you!
LikeLiked by 1 person
I finally have a chance to take another look on these 3 sets of photos. I see it now – in full zoom, raw definitely is better.
>> Overexposed set: If you have time do this, try bringing down the brightness until you are able to show the details on the fabric behind in both the sets and then check.
I tried this and again, raw shows more details in full zoom.
I’ll definitely shoot in raw from now on. Thanks, Raj.
LikeLiked by 1 person
Oh .. Glad that you were able to visualize it. Thanks for your feedback Helen, that gives lot of confidence to me too about my understanding of the raw shooting. 🙂
LikeLiked by 1 person
Raj, some of the photography “how to articles” I’ve read have suggested that it is best to photograph with the histogram more to the right. I interpret this to mean that an slightly over-exposed image is better than under-exploded. Do you have any thoughts about this?
LikeLiked by 2 people
Actually there are lot of theories…such as expose to the right, where one does intentional over exposure but with out blowing out the highlights. Then in the post he will have better control over the things. In this case histogram would be on the right. But this also depends on the camera ability to recover the data. Nikons good at recovering the shadows where as Canons good at recovery of highlights. Basically one should be able to recover the details in the post processing. But remember in generally, darkening a image in post process is easy than brightening the image. So as you said slight over exposed image might have an advantage.
LikeLiked by 2 people
Thank you for that clarification. It seems that these follow-up discussion serve to further our understanding of photography…your lesson posts motivate thinking. So great 😃
LikeLiked by 1 person
Brenda, I am glad you asked the question. I think I had read that, too.
>>… intentional over exposure but with out blowing out the highlights
This may be another fun thing to experiment 😉 So… it’s better to blow out the dark side than blow the highlight, but if we don’t get to the point of blowing out, over expose may have an advantage… yes?
I totally agree with Brenda. These follow-up discussions really helps. Not many classes offers this kind of opportunity. Thanks, Raj, Brenda, Amy… everyone!
LikeLiked by 2 people
Pingback: XDrive Photography Learning – 13 – Raw vs Jpg – XDrive
Even though I am a jpeg point and shoot-er I find this discussion enlightening. I usually try to take at least two pictures of a thing, with some setting or other different (my camera, while it doesn’t shoot raw does have a manual mode). This discussion gives me some ideas to test out. Thank you.
LikeLiked by 1 person
Thank you, Kate (did I get your name right?) I am so glad that you are able to get something out of this discussion, because that’s why we wrote it 😉 We have a lot of fun, can you tell? Please consider joining us… maybe not for raw vs. jpg since your camera doesn’t take raw, but join us for other lessons.
Good night.
LikeLiked by 2 people
Hey Kate, if your camera has “exposure bracketing” try that out. It will allow you to take minimum 3 shots automatically each time you click at different exposure settings, out of that one you keep it.
LikeLiked by 2 people
Helen–you are such a great student of photography. I am still trying to figure out this raw vs jpg thing. These photos are wonderful, and reading Raj’s comments made me go back and look at them again…but this time with a more discerning eye. Remarkable! The photos are terrific.
LikeLiked by 2 people
Thanks, Lois.
>> …reading Raj’s comments made me go back and look at them again…
I did, too, and I was the one who took those photos 😉
This is the most enjoyable class I have ever taken. Raj’s willingness to share his knowledge even after giving his lesson is valuable. Now I know that I can be a good student if I have a good teacher 😉
You have a wonderful and unique photographing style, which is not something easy for anyone to learn (I think one has to born with the gift).
Have a wonderful evening.
LikeLiked by 1 person
Another nice exercise, nicely cone.
LikeLiked by 1 person
Thank you, Sally. I am trying hard to maximize my learning for each lesson, can you tell? 😉
LikeLike
That is a lot of effort for showing us the difference between Raw and Jpg. You are a serious student. I feel like I know so much better of Raw from Raj’s lesson and your post.
Thank you, Helen! 🙂
LikeLiked by 2 people
Thanks, Amy. Yes, I am a serious student. Now that I don’t have to go to work, I can afford (the time) to be a serious student, learning things I like to learn. Life is good after retirement, let me tell you. 😉
Have a wonderful evening.
LikeLiked by 1 person
True, I haven’t met a retiree who is unhappy. My neighbor is trying to adjust… 🙂
LikeLiked by 1 person
Oh, maybe she or he needs a good camera 😉
Good night.
LikeLiked by 1 person
I think he does need a camera 🙂 But, he does a lot of gardening and yard work, he also takes care of our front yard, blow our walk way and drive way. 🙂
LikeLiked by 1 person
I want to retire.. hmm… not that easy.. still kids in school! 😀
LikeLiked by 1 person
😉 I retired when I was 62, so, yes, you still have many years to go 😉
However, if you ask me, I would say 55 is a better age to retire, so one can spend time doing what he/she likes to do and get to be good at it.
Good night, and don’t forget to go to work tomorrow… 😉
LikeLiked by 1 person
I agree, 55 is good as you still have more energy and fitness levels. But I doubt if I can do it.. probably slowing down from work may be better idea.. but as you grow you are burdened with so much of responsibilities and generally part time becomes too difficult.
LikeLiked by 1 person
Part time is NOT good. Knowing how busy IT is and how much we want to get the job done, we will end up working full time but get part time pay. I can see that happen. 😉
LikeLiked by 1 person
Yes, Helen, its true.. in my current place also I started parttime. But soon found out that I was doing a fulltime job so switched to official full time! 😀
LikeLiked by 1 person
Pingback: XDrive Photography Learning – Reveiw – Oct – XDrive
What a wonderful submission Helen. You have explained things so nicely. Hope one day I will be doing this exercise myself of raw vs jpeg.
LikeLiked by 1 person
Thank you so much, Pupali. Raj’s lessons are great. But I am more surprised at how many wonderful photographers I have found because of his lesson. I love your photos! Looking forward to seeing more on your blog.
Have a great day.
LikeLike